OSOM® Flu SARS-CoV-2 Combo Test
How To & Documents
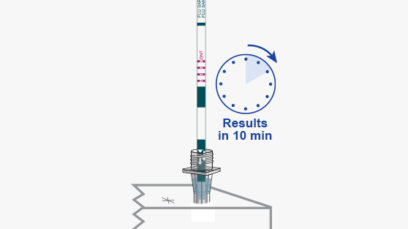
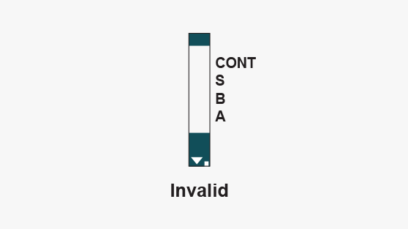
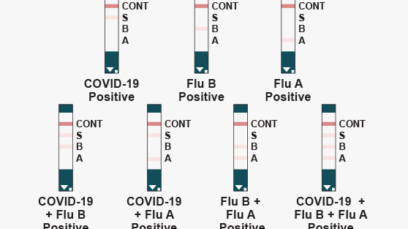
The OSOM® Flu SARS-CoV-2 Combo Home Test was designed with home testing users in mind. The test procedure consists of a gentle nasal swab that is mixed in a ready-to-use extraction solution. After mixing the nasal swab sample in the extraction solution, a test strip is then placed in the sample mixture. In just 10 minutes, you will be able to detect and differentiate between COVID-19, Flu A, and Flu B.

How to use the test.
Carefully read all instructions before performing the test. Failure to follow the instructions may result in inaccurate test results. Refer to the Instructions for Use (IFU) for more complete information.

Step 1
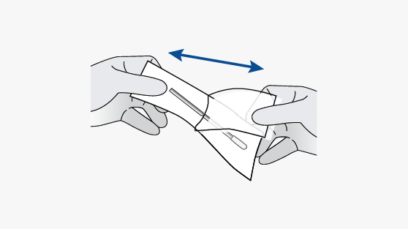
Step 2
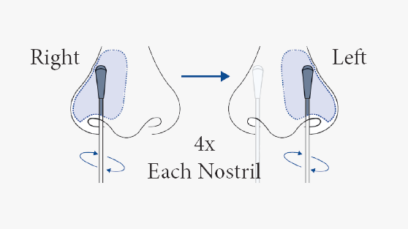
Step 3
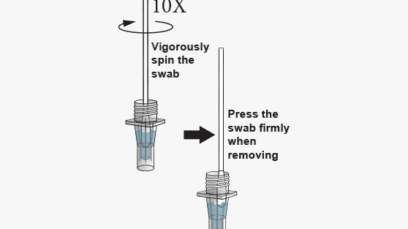
Step 4
Step 5
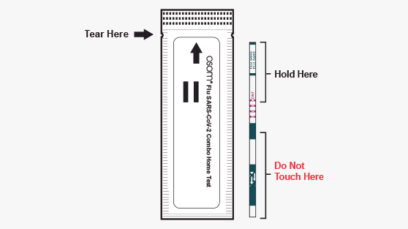
Step 6

Step 7
Step 8

Step 9
Step 10
Documentation
Download more information.

Quick Reference Guide
Kit Expiry Date Extension
Contact us
Need assistance?
Still need help? Fill out the form, send us an email, or call us.
![]() 800-491-6220
800-491-6220